

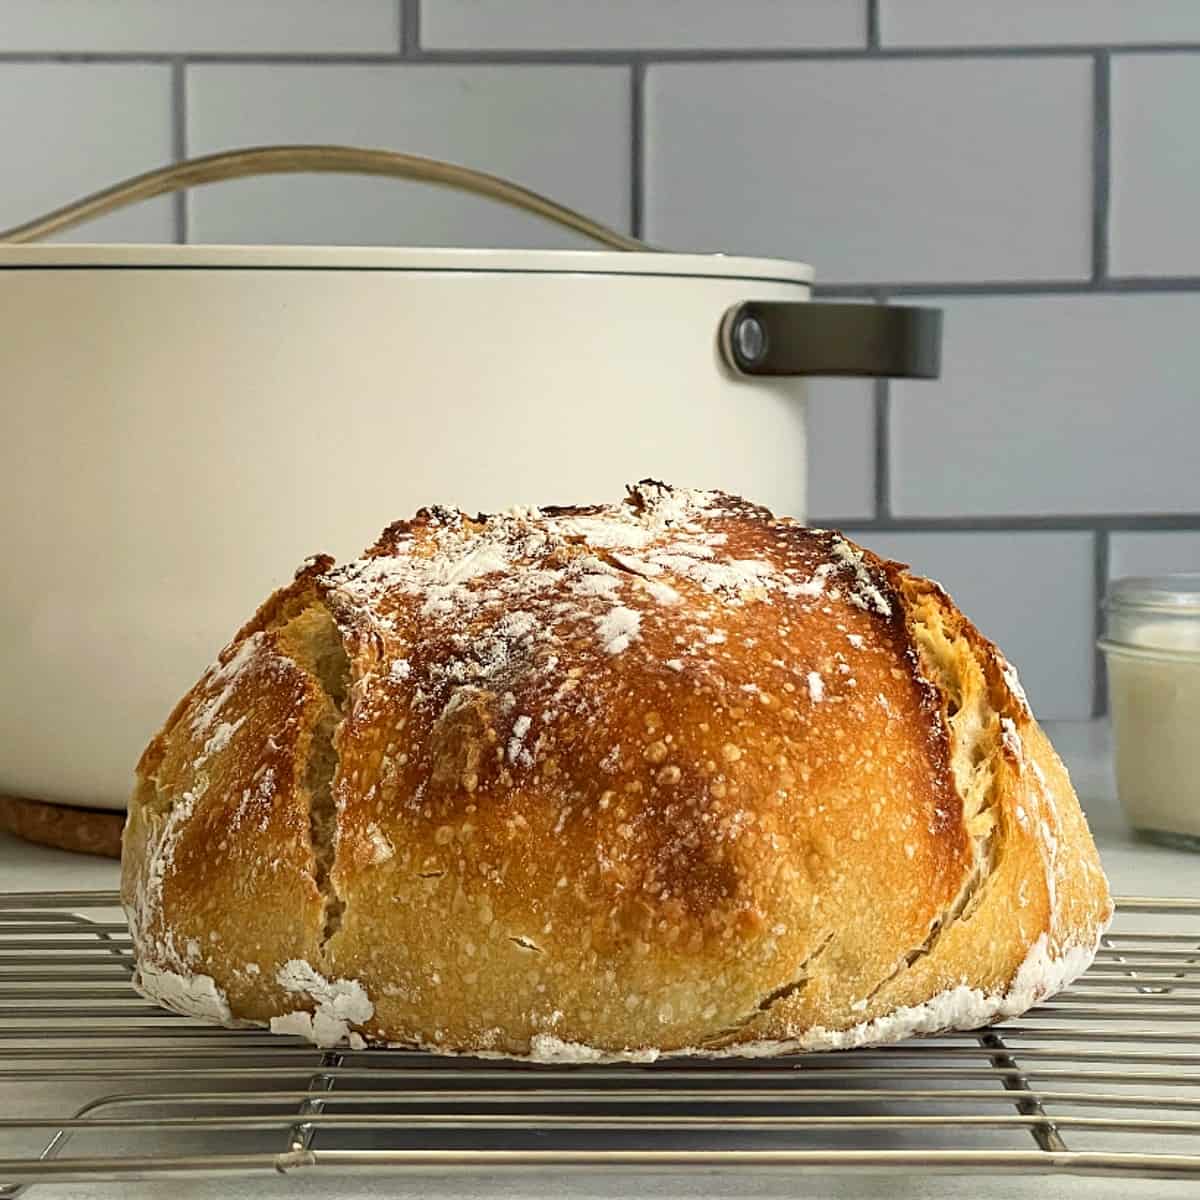
This recipe for Dutch Oven Sourdough Bread will be the easiest loaf of sourdough bread you will ever make! All you need is a Dutch oven and 4 ingredients to make this artisan-style bread at home.
Jump to:
Why You Will Love This Recipe
This will be hands down the easiest sourdough bread you ever make! I took my No-Knead Rosemary Bread recipe and subbed out the instant yeast for an active sourdough starter and presto! Amazing bread with little effort just like my Easy Ciabatta Rolls Recipe.
This bread is completely from scratch and it will seem like you took hours folding and kneading. And if you want even more bread in your life, check out my 33 Easy Homemade Bread Recipes.
Ingredients Needed to Make Dutch Oven Sourdough Bread
Remember to use quality ingredients and maintain proper hygiene when working with sourdough bread recipes to ensure the best results. Enjoy the process of baking and savor the unique flavors of homemade sourdough bread!
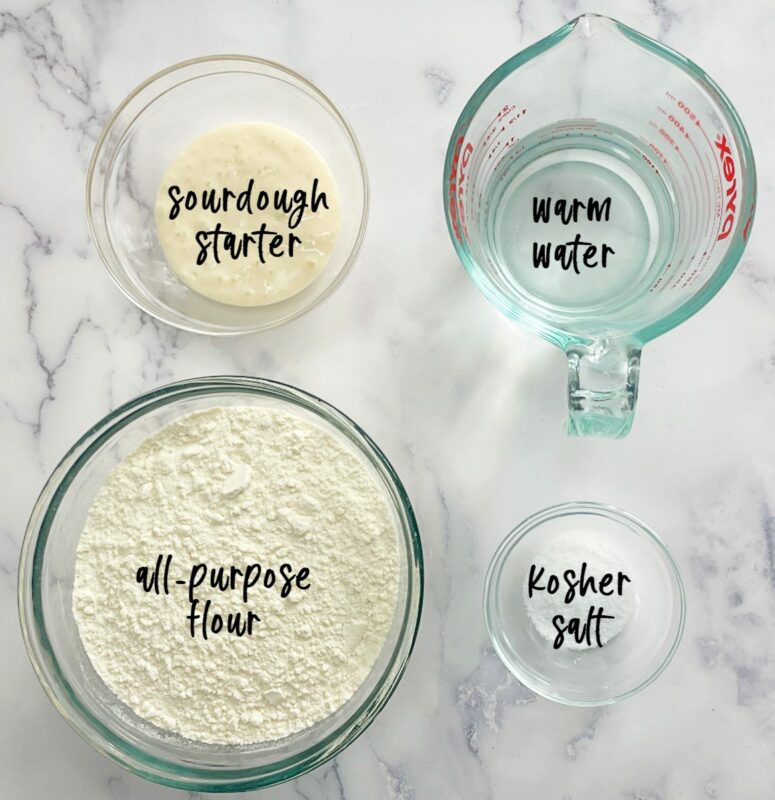
- All-purpose flour is a versatile type of flour suitable for various baking purposes.
It is made from a blend of hard and soft wheat, which gives it a moderate protein content (around 10-12%). All-purpose flour provides structure and contributes to the texture of the bread. - Salt plays a crucial role in bread baking, including sourdough bread. It enhances the flavor of the bread and also strengthens the gluten structure, contributing to a better texture and crumb in the final loaf. It also helps control the fermentation process by regulating the activity of yeast and lactobacilli in the sourdough starter.
- Sourdough starter (well-fed and active)- A sourdough starter is a combination of flour and water that has undergone fermentation. It contains wild yeast and lactobacilli, which provide natural leavening and add distinct flavors to the bread.
A well-fed and active starter has recently been fed with a mixture of flour and water, allowing the microorganisms to multiply and produce gas for leavening. - Water is a crucial ingredient in sourdough bread recipes. It hydrates the flour, allowing gluten formation and enzymatic activity. The amount of water used can vary depending on factors such as flour hydration, dough consistency, and personal preference, affecting the final texture and hydration level of the bread.
*See the recipe card for the complete list of ingredients and quantities.

How to Know if Your Sourdough Starter is Active
- Rapid Growth: After feeding, your starter should double or triple in size, with visible bubbles on the surface and sides of the jar.
- Texture: The starter should be light and airy. When you scoop a spoonful, it should be fluffy and slightly stretchy.
- Aroma: A mature starter will have a pleasant, slightly tangy smell, with hints of fermentation and acidity. Avoid strong vinegar-like or foul odors.
- Float Test: To check readiness, perform a float test. Drop a small spoonful of starter into a glass of water-if it floats, your starter is active and ready to use.
How to Make No-Knead Sourdough Bread

Step 1: Place the flour and salt in a large mixing bowl and whisk together to fully combine. Add the sourdough starter and water and combine everything using your spatula. The dough will be shaggy and sticky.

Step 2: Tightly cover the bowl with plastic wrap and allow the dough to rest for a minimum of 12 hours at room temperature. I like to make my dough in the evening and let it rest overnight.

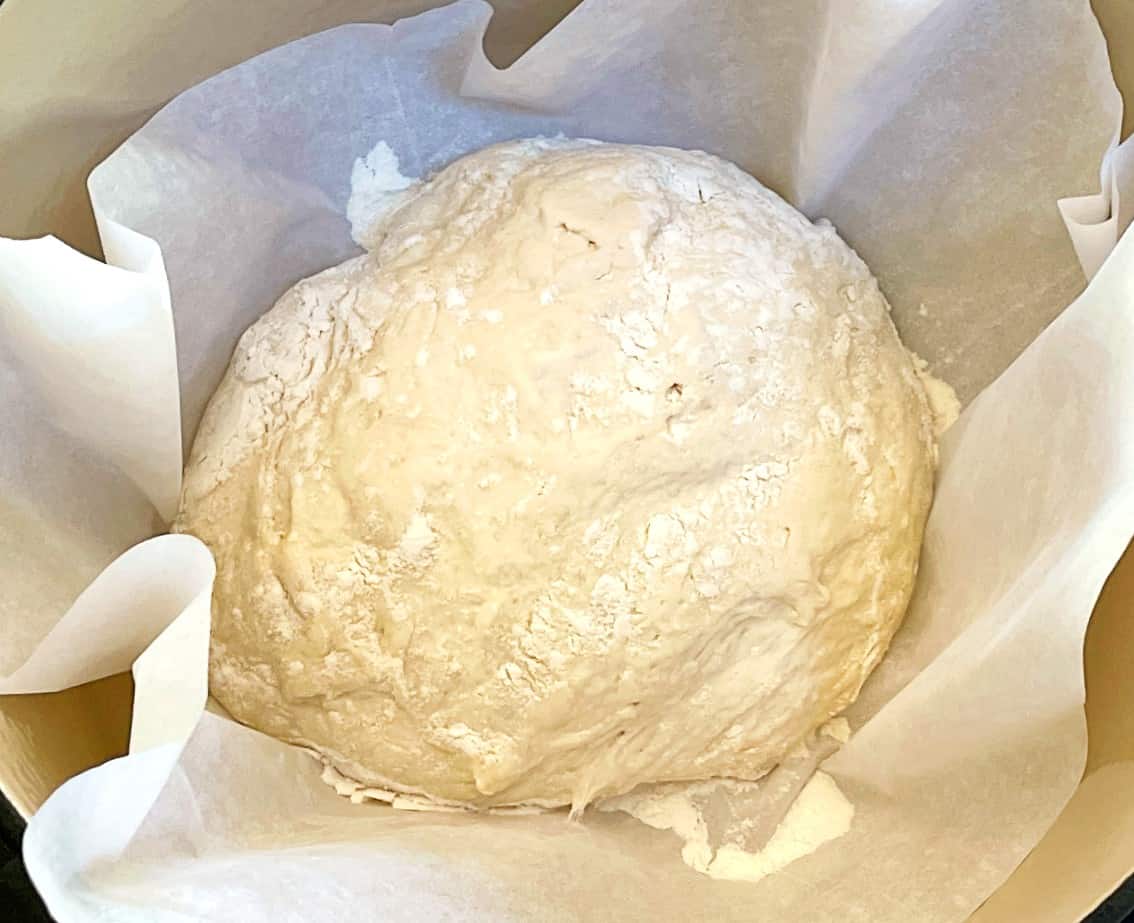
Step 3: Preheat the oven to 450°F and place the Dutch oven in the oven to warm up for 30 minutes. Gently scrape the dough out of the bowl onto a piece of lightly floured parchment paper. Sprinkle some flour on top of the dough and with floured hands, gently shape the dough into a ball the best you can. Cover with plastic wrap or a clean towel to rest while the oven is heating up.
Step 4: After 30 minutes of the oven and Dutch oven heating up, take the parchment paper with the dough on it and place the entire thing in the preheated Dutch oven. Be careful, it's hot.

Step 5: Place the lid on the Dutch oven and bake for 30 minutes. Remove the lid and bake for another 10 minutes to get a nice brown crust.
Step 6: Remove the Dutch oven from the oven and allow the bread to cool in the Dutch oven or on a cooling rack.
Expert Tips For This Recipe
- Only use a sourdough starter that is active, well-fed, and at room temperature to ensure you get the best results possible.
- Parchment paper is a must! Because the dough for this bread is so sticky, the parchment paper will not only help you move it into the hot Dutch oven, but it will also keep it from sticking to the pan itself.
- Make sure your Dutch oven or pan is rated for high temps because this bread cooks at 450º. As I mentioned above, you need your Dutch oven or covered pot to be able to get nice and hot and be safe while doing so.
- Don't forget to preheat your Dutch oven while you are preheating the oven. This will help create the awesome crust and bubbly insides of the bread.
Tools You Will Need to Make This Bread
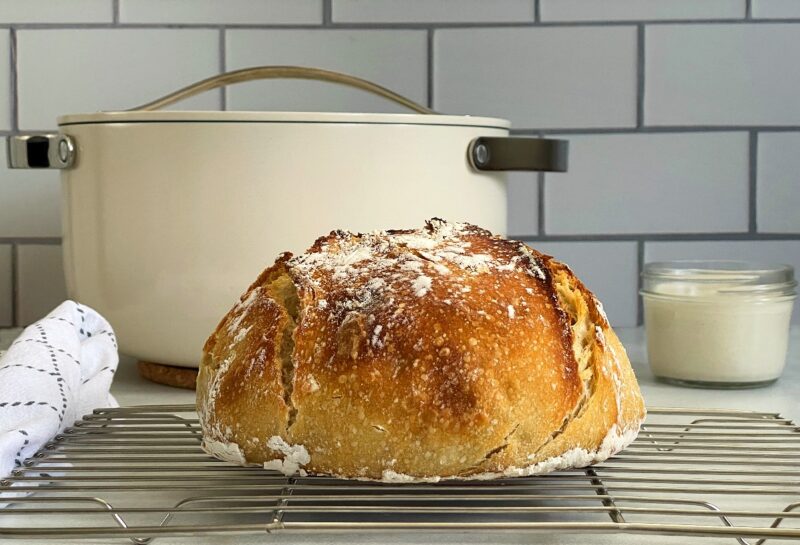
To make Dutch Oven Bread, you will need a Dutch oven. My new favorite brand is Caraway, as seen below. It has a non-toxic ceramic coated inside, is oven-safe up to 550°F, and comes in some beautiful colors.
And you will want to use a sturdy silicone spatula for mixing and scraping the dough out of the bowl. I use my silicone spatulas every single day and this set has the perfect sizes at a great price.

Recipe FAQs
The best way to cook this bread is in a Dutch oven. If you don't have one, you can also bake it in a different pot and have delicious bread with hardly any effort. Just make sure you have a pot with a lid that can handle 450º.
Using a Dutch oven when baking bread creates a beautiful and crunchy crust that most people think of when they think of rustic or crusty bread. The lid of the Dutch oven keeps in the steam which helps with the crust and the overall baking process.
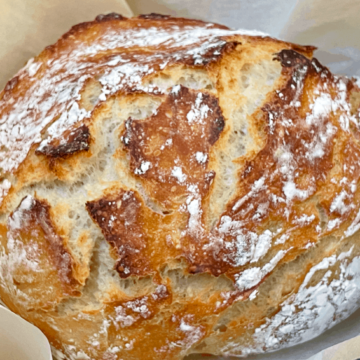
Not only is this bread no-knead but there is also no scoring! The crust on my bread shown in the photos happened naturally and looked great.
If you get a chance to make this Dutch Oven Sourdough Bread, tag me on Instagram or Facebook and show me, or leave a review below! You can also follow me on Pinterest and sign up for my e-mail list to receive more fun and delicious recipes in your inbox.
Dutch Oven Sourdough Bread (no-knead)
Equipment
- rubber/silicone spatula or wooden spoon
- plastic wrap
Ingredients
- 3 cups all-purpose flour (380.5g)
- ¼ cup sourdough starter (73.73g)
- 1½ teaspoon kosher salt
- 1 cup water, room temp
Instructions
Dough Prep Part 1
- Place the flour and salt in a large mixing bowl and whisk together to combine. Add the sourdough starter and water and stir it in using your spatula. If you need a little more water, add a teaspoon at a time. The dough will be shaggy and sticky.
- Tightly cover the bowl with plastic wrap and allow the dough to rest for a minimum of 12 hours at room temp. I made my dough in the evening and let it rest overnight.
Dough Prep Part 2
- Preheat your oven to 450°F and place the dutch oven in as well to warm up for 30 minutes.
- While the oven is warming, the dough will rest one more time. The dough should have risen quite a bit and have lots of lovely bubbles. Use your silicone spatula to gently scrape the dough out of the bowl onto a piece of lightly floured parchment paper. Sprinkle some flour on top of the dough and with floured hands, gently shape the dough in a ball the best you can. Cover with plastic wrap or a clean towel to rest while the oven is heating up.
Bake the Bread
- After 30 minutes, take the parchment paper with the dough on it and place the entire thing in the preheated dutch oven. BE CAREFUL, IT'S HOT! Place the lid on and bake for 30 minutes. Remove the lid and bake for another 10 minutes to get a brown crust.
- Remove the pan from the oven and allow the bread to cool in the dutch oven or on a cooling rack. Enjoy!
Video
Notes
- Only use a sourdough starter that is active, well-fed, and at room temperature to ensure you get the best results possible.
- Not only is this bread no-knead, but there is also no scoring! The crust on my bread shown in the photos happened naturally and looked great!
- Parchment paper is a must! Because the dough for this bread is so sticky, the parchment paper will not only help you move it into the hot dutch oven, it will also keep it from sticking to the pan itself.
- Make sure your dutch oven or pan is rated for high temps because this bread cooks at 450º! As I mentioned above, you need your dutch oven or covered pot to be able to get nice and hot and be safe while doing so.
- Don't forget to preheat your dutch oven while you are preheating the oven. This will help create the awesome crust and bubbly insides of the bread.
Nutrition
Any nutrition calculations are only estimates using online calculators. Please verify using your own data.


Heather says
I’m onto my second loaf with your recipe so many are far to complicated for me to understand as I’m not a baker but this recipe is very easy and straightforward.
Emily says
Thank you Heather! That's why I wanted to create this recipe, to make sourdough easy 😊...especially for beginners. Happy Baking!
DEZP says
First time making sourdough bread and it turned out great. Thank you for your recipe. Great for those of us who are chronically ill and don’t have the level of energy that some other sourdough bread recipes would take. Also used a large cast-iron frying pan to make the loaf and it turned out great. This is a keeper.
Emily says
I'm so glad you loved this recipe and found it easy. Happy Baking ☺️
Anne says
I love this super easy recipe, and the bread is perfect and delicious! I was wondering if you’ve ever doubled the recipe and if so, do you have any tips? Thank you for sharing this recipe!
Emily says
Hi Anne, I'm so glad you like this recipe! I have not personally doubled this recipe to make a larger loaf, but I have made 2 loaves back to back. If you bake a double batch, expect a taller loaf with longer baking time (you need to get to an internal temp of 208 to 212°F). Another tip for a large loaf is to make sure your dutch oven is large (8qt or larger) and cool the loaf completely before slicing. For results like you have experienced, consider splitting the dough to bake two loaves separately for even cooking and a better crust. Enjoy 😊
rad says
I'm anxious to try this recipe, but how do I know if my starter is active and well-fed? I was given the starter at a workshop and have followed the instructions for feeding it, but my loaves are dense and the starter doesn't seem to rise or bubble like you described. This was 100 yr-old mother starter, so I hope I haven't killed it!
Emily says
Hi, here are some signs your starter is active: After feeding, your starter should double or triple in size, with visible bubbles on the surface and sides of the jar.The starter should be light and airy. When you scoop a spoonful, it should be fluffy and slightly stretchy. To check readiness, perform a float test. Drop a small spoonful of starter into a glass of water—if it floats, your starter is active and ready to use. Hope that helps!
Jk says
Can anything be added to this recipe such as cinnamon or raisins or nuts?🔩
Emily says
Hi, yes you can add some herbs, spices or nuts to this bread.
Maria says
It says let dough sit a minimum of 12 hours. How long can I let it sit before it’s too long? If I make the dough at 8pm could I bake it at 1pm the next day or is that too long
Emily says
Hi Maria! Every dough will be different but I think if you were within 18 hours or so of rest time you will still be fine. There is apoint where bread will become overproofed, however, so make sure you don't forget about it or get too busy 🙂
Christine says
first timer here using my starter and it turned out beautifully! thank you for this recipe, so simple, yet so good! I'm so happy 🥰
Emily says
You are so welcome, Christine! Enjoy your freshly baked sourdough!
Angela Jung says
What size dutch oven for you use? 5 qt?
Emily says
I have a 6qt dutch oven. But, 5 qt would work just fine.
MB says
Thank you for sharing this recipe. Tried another recipe and it was a disaster. My first try at yours and it was amazing .....and still is on loaf # 3. And so much less work than the one that failed on me. Highly recommend!!
Emily says
Thanks for trying the recipe, I'm so glad you liked it. Happy Baking!!