Make these whimsical Ghost Cake Pops to add a spooky touch to your Halloween festivities. These delectable treats are not only adorable but also delicious, making them a perfect addition to your Halloween dessert spread.

Jump to:
Why You'll Love This Recipe
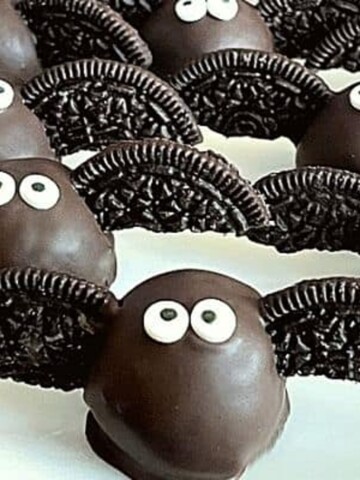
- These Halloween Cake Pops are easy to make, just like my Halloween Bat Cake Pops.
- They only require a handful of ingredient,s and some are already made.
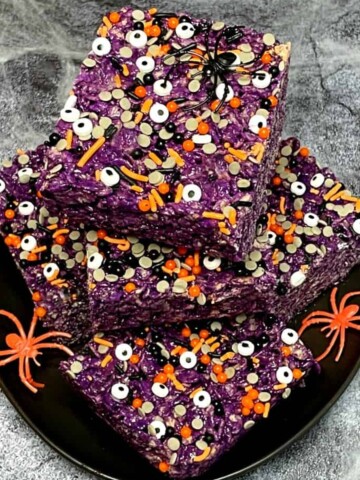
- Kids will have a blast shaping and decorating these ghosts just like they do making Frankenstein Rice Krispie Treats for Halloween.
- These Halloween goodies are popular with adults and kids.
- You can make these ahead of time to bring to a celebration like my Crumbl Cookie Copycat Recipe.
Key Ingredients Needed for This Recipe

- Boxed Cake - Any boxed cake will work for this recipe. I used white for a basic vanilla flavor, but you can use any cake flavor you like.
- Canned Frosting - You can also use any flavor you like for the frosting. I like cream cheese as it's not quite as sweet as other flavors. You can also try my Caramel Apple Frosting for the ultimate Halloween flavor.
- Vanilla Candy Coating - Also known as almond bark, vanilla-flavored coating has become easier to find in most baking aisles at grocery stores. If you can't find it you can also use white chocolate chips or melting chips found at craft stores.
- Black Writing Gel - This decorating gel is easy to find at most grocery stores or online. It's the perfect consistency for making ghost faces on the cake pops.
*See the recipe card for the complete list of ingredients and quantities.
Step by Step Instructions

Step 1: Make a boxed cake and allow the cake to cool completely. Place pieces of the cake in a large mixing bowl, breaking up the pieces with a spatula or your hands to get small crumbles.

Step 2: Take ¾ or the entire can of frosting and mix it into the crumble mixture. This takes a little elbow grease to get it all mixed in. The mixture will be similar to dough.

Step 3: Scoop out 1 ½ tablespoons of cake mixture and roll it into an oblong-shaped ball between your hands. Form a ghost shape on your hand and place it on the wax paper.

Step 4: Melt the vanilla candy coating and add the vegetable oil to thin it out. Using a spoon, pour the melted candy coating over the top of each ghost coating them completely.

Once coated, make a face on each ghost with the writing gel. Get creative or make them all the same.
Expert Tips For Halloween Cake Pops
- I'm impatient and put my cake in the fridge to cool faster. Just make sure your pan is on a heat-safe pad of some sort and has cooled for at least 10 minutes before placing it in the fridge.
- After shaping the cake pops, chill them in the refrigerator for at least 30 minutes. This helps them firm up and easier to dip in the candy coating.
- When melting the candy coating, use a microwave or a double boiler and stir it at regular intervals to prevent overheating. Overheated chocolate can become too thick
- Also, ensure the bowl and spoon are completely clean and dry before melting the almond bark. If any water or steam gets into the mixture, it will seize.
- Allow the ghosts to set before serving. Depending on the temperature in your house, this could take 30 minutes to an hour. To speed up the candy coating setting, you can stick the pan of cake pops in the fridge for 20-30 minutes.
- If your candy coating starts to thicken, place it back in the microwave for 20 seconds to soften it again.
- Experiment with different cake and frosting flavors or add extracts, spices, or mix-ins to your cake pop mixture.

Recipe FAQs
To keep the dough from sticking to your hands while forming the ghosts, spray them with non-stick spray or place a little vegetable oil on your hands. Repeat if necessary.
My version does not have a lollipop stick on the bottom. I find it easier to make, store, and serve. Of course, you can add sticks if you want to, just make sure to do it before dipping in the candy coating.
These Halloween Cake Bites will last in the fridge in a covered container for 3-4 days.
I used a white cake mix for these cake balls and a vanilla frosting. You can use any flavor combination that you like, including chocolate, spice, and yellow cake, to name a few.
More Halloween Recipes To Check Out
If you get a chance to make these Ghost Cake Pops, tag me on Instagram or Facebook and show me, or leave a review below! You can also follow me on Pinterest and sign up for my e-mail list to receive more fun and delicious recipes right in your inbox.

Ghost Cake Pops
Equipment
- 9x13 sheet cake pan (or any pan to make a cake)
- spoon
Ingredients
- 1 box cake mix (I used white)
- vegetable oil (to make cake)
- eggs (to make cake)
- water (to make cake)
- 1 can frosting (I used vanilla)
- 1 package vanilla candy coating (can sub almond bark or white chocolate)
- 1-2 tablespoons vegetable oil (can sub canola or coconut oil)
- black writing gel
Instructions
- Make a boxed cake as directed on the box and allow the cake to cool completely. Once the cake has cooled, cut it into small pieces and place them in a large mixing bowl. Break up the pieces with a spatula or your hands to get small crumbles.
- Take ¾ or the entire can of frosting and mix it into the crumble mixture (I find ¾ is plenty but you can go all in too). This takes a little elbow grease to get it all mixed in. The mixture will be similar to dough.
- Prepare a cookie sheet with wax paper. Scoop out 1 ½ tablespoons of cake mixture and roll it into an oblong-shaped ball between your hands (this is easier if you spray your hands with non-stick spray). Form a ghost shape on your hand and place it on the wax paper. Continue to make ghosts with the rest of the mixture. Don't worry if your ghosts are perfect, they look spookier if they are a little messy.
- After shaping the cake pops, chill them in the refrigerator for at least 30 minutes. This helps them firm up and easier to dip in the candy coating.
- Melt the vanilla candy coating in a microwave-safe bowl for 45 seconds. Stir the coating and continue to melt at 20-second intervals until fully melted. You can also use a double boiler on the stove. Add the vegetable oil to thin out the coating slightly.
- Using a spoon, pour the melted candy coating over the top of each ghost coating them completely. You may need to use a few spoonfuls to get the ghost completely covered. Repeat with all of the ghosts. If your candy coating starts to thicken, place it back in the microwave for 20 seconds to soften it again.
- Once coated, make a face on each ghost with the writing gel. Get creative or make them all the same.
- Allow the ghosts to set completely before enjoying them (you can speed up the process in the fridge).
Notes
-
- I'm impatient and put my cake in the fridge to cool faster. Just make sure your pan is on a heat-safe pad of some sort and has cooled for at least 10 minutes before placing it in the fridge
- After shaping the cake pops, chill them in the refrigerator for at least 30 minutes. This helps them firm up and easier to dip in the candy coating
- When melting the candy coating, use a microwave or a double boiler and stir it at regular intervals to prevent overheating. Overheated chocolate can become too thick
- Also, ensure the bowl and spoon are completely clean and dry before melting the almond bark. If any water or steam gets into the mixture it will seize
- Allow the ghosts to set before serving. Depending on the temperature in your house this could take 30 minutes to an hour. To speed up the candy coating setting, you can stick the pan of cake pops in the fridge for 20-30 minutes
- If your candy coating starts to thicken, place it back in the microwave for 20 seconds to soften it again
- Experiment with different cake and frosting flavors or add extracts, spices, or mix-ins to your cake pop mixture
- My version does not have a lollipop stick on the bottom. I find it easier to make, store, and serve. Of course, you can add sticks if you want to, just make sure to do it before dipping in the chocolate
- I used a white cake mix for these cake balls and a vanilla frosting. You can use any flavor combination that you like including chocolate, spice, and yellow cake to name a few
- To keep the mixture from sticking to your hands while forming the balls, spray them with non-stick spray or place a little vegetable oil on your hands
- These Ghost Cake Bites will last in the fridge in a covered container for 3-4 days.
Nutrition
Any nutrition calculations are only estimates using online calculators. Please verify using your own data.






Leave a Reply