

If you think macarons are too hard to make at home, try this Easy Macaron Recipe! This is the perfect, easy recipe for beginners to begin to understand how these delicious treats come together.

French macarons are a tricky little treat and there are so many different recipes and tips out there. I've read quite a few and after the first disaster, I tried another version with quite a bit of success.
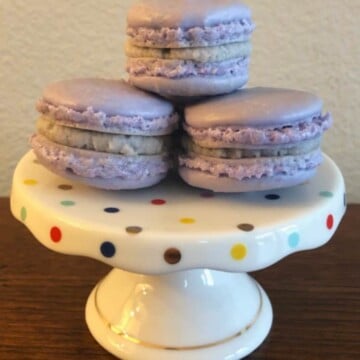
It also impressed my friends and family so hey, I'll take it! The macarons in the photo above are not perfect, but....they were delicious and not too bad for the third time I made them (ok, four, but the first attempt was such a disaster I don't count it. I'll share that story at the end).
Jump to:
- What's the Difference Between Macaron and Macaroon?
- Where To Start? The Egg Whites
- Macaron TIP #1
- The Next Step is to Prepare your Ingredients and Equipment
- Macaron TIP #2
- Now it's time to whip up some egg whites!
- Now you can add the food coloring and vanilla.
- Macaron TIP #3
- And now, the macaronage stage!
- Macaron TIP #4
- Macaron TIP #5
- Macaron Tip #6
- More Delicious Desserts Recipes:
- Basic Macaron Recipe
- Fillings for French Macarons
- Swiss Meringue Buttercream Filling
- My first attempt story
- Did you make this Easy Macaron Recipe for Beginners?
What's the Difference Between Macaron and Macaroon?
It's easy to confuse these two little treats because their spelling and pronunciation are so close. However, one extra vowel and an extremely different appearance and taste set these two treats apart.
Macarons are made with almond flour and macaroons are made with shredded coconut. Both confections are small, use egg whites, and do not have a leveling agent, but that's about the only similarities.
Macarons are sandwich cookies that have a layer of frosting, jam, or ganache, etc. in the middle. They also come in different colors and flavors. Macaroons are coconut-flavored and usually dipped in chocolate.
Where To Start? The Egg Whites
The most important thing for the egg whites is that they are at room temperature. No, not "I pulled them out and waited 10 minutes". Room temperature. That means being out of the fridge for at least an hour.
Some recipes call for "aging" egg whites. This is essentially separating them from the yolks and storing the egg whites in a loosely covered container in a cool dry place for 24 - 48 hours.
Some people say on the counter, and some say in the fridge. I have found that this isn't a necessary step for me, but you can try it if you would like to.
Macaron TIP #1
If I know I am going to be making macarons, I leave myself a reminder to pull out the eggs and butter for the filling first thing that morning. Then, I know they will be room temp by the time I am ready to bake.
I would also suggest separating the whites at this time so that if you have any yolk mistakes, you can fix them right away and still have room-temperature eggs.
The Next Step is to Prepare your Ingredients and Equipment
Measure out all of the ingredients and have them ready to go in separate bowls/containers. This will help make the process move along at a nice pace.
You also want to make sure there is no residue on the bowl or whisk when you are whipping up the egg whites so wipe down the bowl and whisk attachment with a little vinegar before starting.
Macaron TIP #2
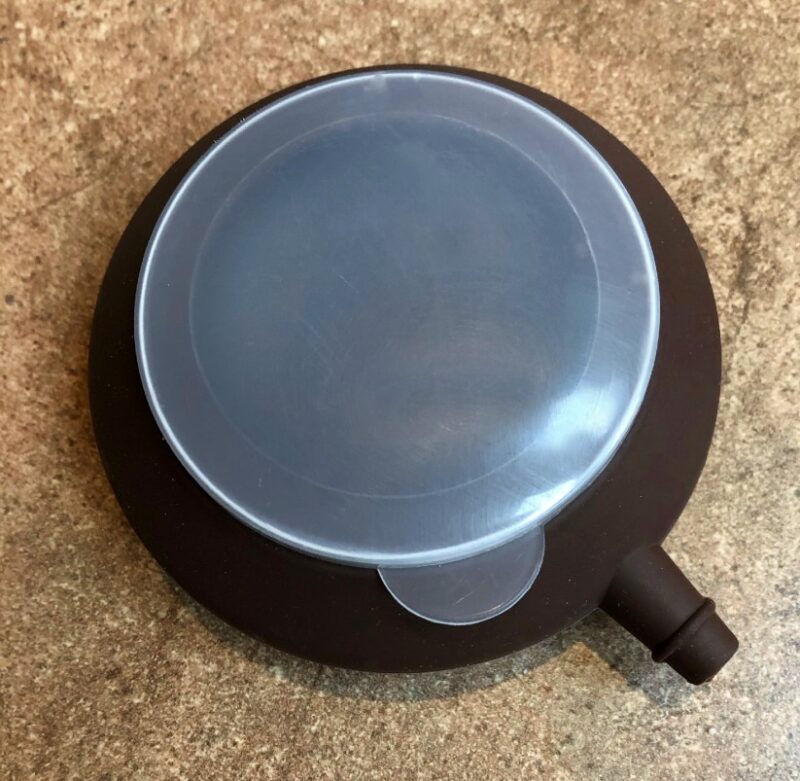
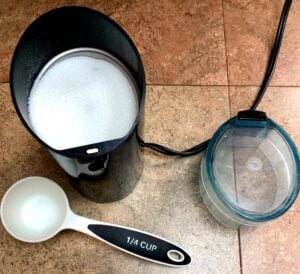
Have your piping pot or piping bag and pans ready to go before you start as well. Below is the piping pot I use.
I like it because it's reusable and the grip is easier than a bag in my opinion. You want the least amount of time between folding and piping. If you are using a piping bag, try the cup trick and have your piping bag tip down in a cup with the sides of the bag folded over the top of the cup for easy filling.
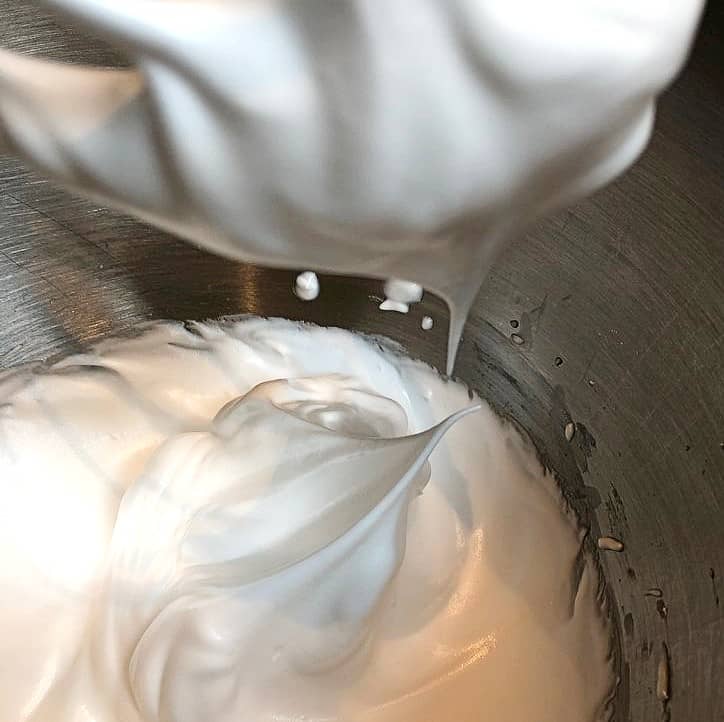
Now it's time to whip up some egg whites!
Don't rush this step or you will probably get hollow macarons. Start out slow until the egg whites are foamy then add the cream of tartar.
Once you have soft peaks, add the superfine sugar. Continue to mix on med-high speed until you have stiff peaks. It will also look like the egg whites are balled up inside the whisk.

Now you can add the food coloring and vanilla.
After you achieve stiff peaks, add the gel color if desired, as well as the vanilla, and mix in completely. Remember once the shells bake, the color will lighten up a bit so if you are looking for a dark-colored shell, add a little extra color.
Macaron TIP #3
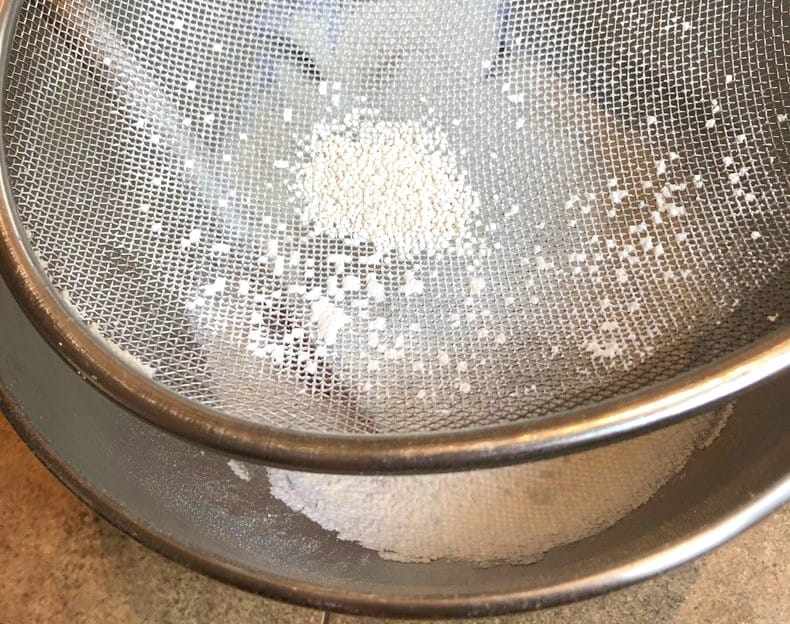
Sifting is your friend! When in doubt, sift again. Make sure you sift the powdered sugar and almond flour together at least twice, if not three times.
The final sift will be right into the bowl of whipped egg whites. Any chinks left behind need to go bye-bye.
And now, the macaronage stage!
Macaronage sounds so fancy and guess what? You are going to do it! Macaronage means the process of knocking out air and folding the egg whites and the almond flour mixture.
This is how you get glossy shells and the cute little "feet". Here is where most people may go wrong. This step is a delicate balance between getting air out but not over-mixing.
I know, I know, how is that a thing? But, practice makes perfect and I still run into issues sometimes. A silicone spatula is the best tool for this process, in my opinion. Get ready to use some elbow grease and make some magic!
Macaron TIP #4
Fold the macaron batter just until you have a "lava-like" consistency. What the heck is that you ask? It means when you pour the batter back onto itself it sinks back into the batter in the bowl and there are no lines after about a minute or less.
So yes, actually count and see how long it takes for the lines to disappear. Once they go away within that time frame, stop mixing!
Macaron TIP #5
Don't be intimidated and don't quit! If your first batch doesn't work, I hope you try again. There's a reason French Macarons are sold for a hefty price and not everyone makes them.
But I promise you will get results. And even if they aren't "perfect", they will probably still taste good. I have had no issue eating my mistakes.
Macaron Tip #6
Remember, everyone's oven is different. The pan is different, the climate is different, and the ingredients are different brands. Because of this, you may have to adjust as needed. Practice makes perfect, right? I still have issues now and again when making these treats, but I never stop making them!
More Delicious Desserts Recipes:
- Easy Cake Bites
- Fresh Cherry Tart Recipe
- Instant Pot Strawberry Cheesecake
- Cake Batter Rice Krispie Treats
Basic Macaron Recipe
Equipment
- stand mixer with whisk attachment
- sifter/fine mesh strainer
- piping bag with round tip
- parchment paper or silicone mat
Ingredients
- 1 cup powdered confectioners sugar
- ¾ cup almond flour (see notes on how to make your own)
- 2 large egg whites, room temp
- ¼ teaspoon cream of tartar
- ¼ cup superfine sugar (see notes on how to make your own)
- ¼ teaspoon vanilla extract
- gel food coloring
Instructions
- Prepare baking sheets with parchment paper or a silicone mat. Make sure ALL of the ingredients are at room temp.
- SIFT together the almond flour and powdered sugar. Discard any lumps in the sifter, do not force through, and set the bowl aside. (tip: your almond flour should be as dry as possible, you may need to spread it out on a baking sheet and allow it to dry for 1-2 hours).
- Put the room temperature egg whites in the mixer bowl with a whisk attachment. Start at low speed and move to medium speed until foamy (see pic). And add the cream of tartar.
- Once you have soft peaks, add the superfine sugar. Continue to whisk until stiff peaks form. Add the vanilla and food coloring and continue to mix until all of the color is mixed in.
- SIFT the flour and sugar mix once again into the egg whites and discard any lumps in the sifter.
- Fold until everything is combined. I use a silicone spatula and that works very well. Press the batter into the sides of the bowl to get out some of the air to avoid hollow macarons. The mixture will be sticky and should have a lava-like consistency, meaning when you pour it onto itself self it sinks back into the batter with no lines after about a minute or less.
- Put the batter in a pastry bag or macaron dispenser (see photo below, Amazon has a bunch to choose from). Try to get all the air out of the bag before you start. Pipe circles with the bag/tip straight up, you'll figure out what works best for you. I don't use a stencil which is why my macarons are not all the exact same size, but you can if you want to.
- Tap the pans on the countertop...A LOT, you will see bubbles come up and that's what you want. Carefully poke any bubbles with a toothpick before you let the macarons rest. Let the pans sit for 30 minutes and do not touch or tap anymore or you will get cracks or holes in your finished macarons. This allows the macarons to create a crust and helps develop the feet. You know they are ready when you lightly place your fingertip on the outside and nothing comes off on your finger.
- Preheat the oven to 375°F.
- Turn down the oven to 325°F. Bake one pan at a time for 5 minutes, rotate, and bake for 5 more minutes. Remove the pan from the oven, turn the heat back up to 375°F, and let the macarons rest on the pan for 10 minutes. Carefully transfer them to a wire rack to cool completely. Turn the oven down to 325°F and bake the second sheet. TIP: While the macarons are baking and cooling, you can make the filling if you have not already (recipe below).
- Once cooled, make your favorite filling and place it in a pastry bag with a round tip. Fill a circle around the edge of one half of a cookie and place the second half gently on top. Be careful not to push too hard or you will smash your beautiful creation. Enjoy!
Notes
HOW TO MAKE ALMOND FLOUR
- add ¼ cup raw, blanched (no skin) almonds and 1 teaspoon powdered confectioner sugar to a small coffee/spice grinder or food processor (if you are using a food processor, double the amount).
- Pulse until you have a nice, dry flour-like consistency. Do not over process or you will end up with almond paste!
- You can also buy almond flour, just make sure it's all white (no skins).
HOW TO MAKE SUPERFINE SUGAR
- Add ¼ cup sugar to a small coffee/spice grinder and grind until you have a powdered-sugar-like consistency.
- Some silicone mats have a stencil on them and many people swear by these. I like parchment better and you can make your own cirlce on the parchment if you want to (just remember to flip the paper over so no pencil or ink gets on your batter!).
Nutrition
Any nutrition calculations are only estimates using online calculators. Please verify using your own data.

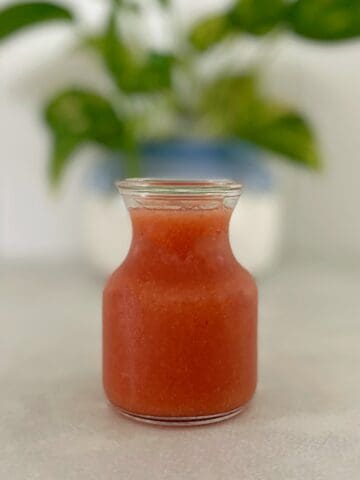
Fillings for French Macarons
Another wonderful thing about macarons is that there are so many filling options which also means there are so many flavor options. A lot of the time flavored macarons have the flavor added to the filling.
My favorite filling, and probably one of the most common, is a Swiss meringue buttercream filling (recipe below). If you don't want a buttercream filling you could also try a curd or a jam or something else completely different!
Swiss Meringue Buttercream Filling
Ingredients
- 1 large egg white, room temp
- ¼ cup sugar
- ¼ teaspoon kosher salt
- ½ cup unsalted butter, room temp and cubed (1 stick)
- ½ teaspoon vanilla extract
- ¾ cup powdered confectioner sugar (optional)
- gel food coloring
Instructions
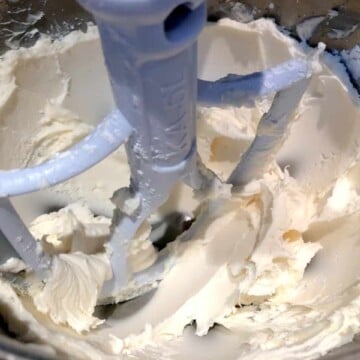
- Make or use a double boiler and whisk sugar and egg white in a heat-safe mixing bowl over a pan of simmering water. Whisk by hand until the sugar has melted and when you rub the mixture between your fingers and you should not feel any granules.
- Place the egg and sugar mixture into the bowl of a stand mixer and whisk at low speed first, then medium until it's a stiff, shiny ribbon-like consistency. Touch the bottom of the pan to make sure it's cool, then you know it's ready. If it's not cool, your butter will melt and the filling will be runny. Be Patient.
- Switch to low speed again and add cubes of butter a little at a time making sure it is combined after each addition.
- Add food coloring and salt and vanilla or almond extract. Increase speed until everything is combined.
- Add powdered sugar if you would like, I found it added a little more substance and made the butter flavor more subtle.
Nutrition
Any nutrition calculations are only estimates using online calculators. Please verify using your own data.

My first attempt story
When I decided to make macarons, I asked my mom to buy me a macaron baking set for Christmas. Ha! If I had the right tools I was halfway there, right?? So the kit arrived via Amazon and I looked on Pinterest for a recipe, picked one at random, and went for it. I don't remember what recipe I tried, I thought they were all the same. And I thought, "I make pretty good desserts, how hard can it be?" Boy was I wrong! My first mistake was the almond flour. I went to my local fancy grocery store, saw almond flour, and bought it. I think it was like $15 but I was so sure I was going to make amazing macarons I bought it. This is what I bought:
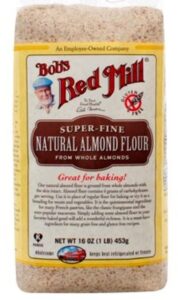
The problem was, it was almond flour from whole almonds with the skin still on. So not only was it heavier, but it had a mixed color, brown and white. I just added it, and it was the beginning of the end. The batter was so lumpy and heavy, it didn't even form a circle, I just had globs of gunk on the pan. You could see the pieces of almond skin, but they weren't pretty. I wish I had taken a picture of the disaster because, in hindsight, it's pretty funny. I still have most of the $15 bag of almond flour in the cupboard, destined to collect dust because I have no idea what to do with it. Maybe I'll think of something...
Another update on 3/7/19, see my post: Instant Pot Lavender Cheesecake for what I did with this flour, it's a good one! After that, I gave up for a while, but finally decided I love macarons so much that I had to try again. Thank goodness I didn't give up, I'm really enjoying trying to get it close to perfect.
Check out my recipe for Pistachio Macarons, it's just as easy but with added ground pistachios!
Did you make this Easy Macaron Recipe for Beginners?
Did you make this recipe? Tag me on Instagram or Facebook and show me! And don't forget to sign up for my email list or follow me on Pinterest so you don't miss a recipe!


Jennielynn says
I was wondering what went wrong. It's taken almostc2 hrs to dry out. Recipe says to slightly touch to test. Still wet. What did I do wrong.
Emily says
Hi Jennielynn, macarons can be tricky so there are a few things that could be the issue. If the shells aren't drying, your batter is too wet or it's too humid where you are at. For a batter to be too wet it could be that the egg whites were not stiff enough. Another thing that can add moisture to your batter is if you use a water-based food coloring. Make sure you use gel or powder color. Lastly, ensure your equipment is clean and free of any water or oil before mixing. I hope this helps, sometimes it takes a few tries to get these to work for you, but I hope you try again!😊
Matt says
Easy to follow
I just made them and they came out with feet but some were slanted. They look like the larger feet on 1 side lol
and they were r chew. What did I do wrong ? Please help
Emily says
Hi Matt,
Thanks for trying out my recipe and for reaching out. Here are a few reasons for lopsided macarons:
1. Uneven heat (probably the most common reason). The easiest fix is rotating your pan halfway through the baking process. This is something I have to do since I know my oven has a hotspot in the back left corner.
2. Your pan could be bent or warped. It happens sometimes with the lighter/thinner pans. A nice heavy pan is best.
3. Piping technique. Make sure you pipe the batter as upright as possible and as even as possible.
4. Too high a temp or convention fan. Not every oven is the same and sometimes they don't actually heat to the right temp. You can always try a little lower temp. Don't use a convection fan, these cookies are too delicate.
5. Mixing the batter (macaronage technique). This is a tricky one, but make sure the batter has been deflated enough and is evenly mixed.
Chewy macarons can be from baking too long or too high a temp.
I hope these tips are helpful and you try macarons again. As I mentioned, they are tricky little treats but worth it in the end. I still have batches that don't turn out well, but I keep at it. Let me know how it goes!😊
Jennifer Stepler says
I had eggs whites left over from making hollandaise sauce on Mother's day and decided to give this a try. Things that went well: These are DELICIOUS! Mine had a great foot, and that crunchy crust/chewy center that makes macarons so wonderful.
I used parchment paper with a template underneath and it worked great. I think this is a great size recipe for a beginner. It makes a nice portion of cookies without taking too much time. As I get better/faster, I'll certainly double this recipe.
Things that didn't go well:
1. The batter was too thick, so they weren't smooth - you could still see swirls from the piping. Next time, I won't add ALL the flour/sugar mixture at once. I'll start with about 80% of it and mix it in, then add a little more at a time to get to the right consistency. It's possible that my whites were too dried out. They had been in the frig for 2 days when I decided to do this. It would be nice to include some tips on what to do if the batter is too thick or too thin - how to adjust.
2. Piping - I had never piped before and didn't want to buy a piping set until I knew it was something I might do more than once, so I used a baggie with the tip cut out. What I learned is that, even though the batter will fit in a quart baggie, use a gallon baggie, and ziplock it closed so you don't get globs of batter squishing out the top. I did get better with practice. Half of my cookies are misshapen blobs but the other half are pretty little circles, even if they do show the piping swirls in them.
3. The recipe seemed too small to work well in my big Kitchenaid PRO stand mixer. Maybe if I doubled it? The whisk was just too big for the small amount of egg whites in the bowl. I finally decided to use the whisk attachment on my immersion blender - which is how I normally whip one or two egg whites - and it worked much better.
4. I thought the cookies were a tad too sweet. Maybe next time I'll just cut back on the powdered suger that I mix with the almond flour - that would help with batter thickness and sweetness both.
Thanks for the easy to follow recipe. Two suggestions: You never say how big to make the circles, which meant I had to check other recipes for that size and you never say what size nozzle to use on the piping bag - since I was just cutting a corner out of a ziploc, I started small and cut until I got it right, but if I had been using a bag with a tip, that would have been difficult.
Emily says
Hi Jennifer. Thanks so much for commenting on your experience and I'm so happy to hear that overall your macarons turned out delicious! I will definitely be adding some more tips to my post based on your recommendations. I appreciate the time you took to write your review and I hope you continue to make macarons!😊
Danielle says
I have tried your recipe 6 times now,and I still can’t get it. But I’m going to keep trying. I keep getting cracks or wrinkles. But I’m going to stick to your recipe.
Emily says
Hi, Danielle. Thanks for your commitment to making macarons and trying my recipe. Here are a few tips:
-If your shells are cracked, there is either too much air in the batter or the oven temp is uneven (mine definitely is). To fix this, make sure you tap the pans on the counter multiple times before allowing the shells to rest and dry. For the oven, you can try rotating the pan halfway through baking. Although this is frowned upon, if you do it quickly and carefully they should still be ok. My oven has a terrible hot spot in the back left corner so I try to adapt to this. You could also try putting your pan on a different rack in the oven while baking.
-The wrinkles could be from the meringue being over-mixed which is always tricky. Make sure you stop beating the egg whites right when you get stiff peaks. Also, make sure you are using room temp egg whites. If I know I'm baking macarons on a certain day, I will crack the eggs in the morning and allow the whites to sit in a bowl on the counter to come to room temp.
I hope you keep trying. Feel free to send me photos of your next attempt...hopefully, this will be the one!😁